
在Linux(CentOS6)上搭建Apache2+Mysql5+PHP5开发环境
2013年12月26日
CentOS安装请阅读安装Centos6服务器
1.从超级用户登录CentOS
# su -
2.安装Apache
# yum install httpd httpd-devel
启动httpd服务,并设置开机启动
# /etc/rc.d/init.d/httpd start
# chkconfig httpd on
3.安装Mysql
# yum install mysql mysql-server mysql-devel
启动mysqld服务,并设置开机启动
# /etc/rc.d/init.d/mysqld start
# chkconfig mysqld on
Mysql初始化(通过mysql_secure_installation命令实现)
# mysql_secure_installation

NOTE: RUNNING ALL PARTS OF THIS SCRIPT IS RECOMMENDED FOR ALL MySQL
      SERVERS IN PRODUCTION USE!  PLEASE READ EACH STEP CAREFULLY!

In order to log into MySQL to secure it, we'll need the current
password for the root user.  If you've just installed MySQL, and
you haven't set the root password yet, the password will be blank,
so you should just press enter here.

Enter current password for root (enter for none):   ← 按enter键(第一次安装的话root密码是空的)
OK, successfully used password, moving on…

Setting the root password ensures that nobody can log into the MySQL
root user without the proper authorisation.

Set root password? [Y/n]
New password:            ← 输入新密码
Re-enter new password:   ← 输入新密码(确认)
Password updated successfully!
Reloading privilege tables..
 ... Success!

By default, a MySQL installation has an anonymous user, allowing anyone
to log into MySQL without having to have a user account created for
them.  This is intended only for testing, and to make the installation
go a bit smoother.  You should remove them before moving into a
production environment.

Remove anonymous users? [Y/n] y   ← 输入y,按enter键
 ... Success!

Normally, root should only be allowed to connect from 'localhost'.  This
ensures that someone cannot guess at the root password from the network.

Disallow root login remotely? [Y/n] y   ← 输入y,按enter键(根据需要,如果允许远程登录的话,输入n)
 ... Success!

By default, MySQL comes with a database named 'test' that anyone can
access.  This is also intended only for testing, and should be removed
before moving into a production environment.

Remove test database and access to it? [Y/n]   ← 输入y,按enter键
 - Dropping test database...
 ... Success!
 - Removing privileges on test database...
 ... Success!

Reloading the privilege tables will ensure that all changes made so far
will take effect immediately.

Reload privilege tables now? [Y/n]  ← 输入y,按enter键,使设置立即生效
 ... Success!

Cleaning up…

All done!  If you've completed all of the above steps, your MySQL
installation should now be secure.

Thanks for using MySQL!
4.安装PHP
由于在CentOS中,缺省某些PHP模块,为了方便PHP的使用,我们需要先安装epel包
# cd
# wget http://dl.fedoraproject.org/pub/epel/6/x86_64/epel-release-6-8.noarch.rpm
# rpm -ivh epel-release-6-8.noarch.rpm
# rm -rf epel-release-6-8.noarch.rpm
# yum install php php-mysql php-common php-gd php-mbstring php-mcrypt php-devel php-xml php-pear
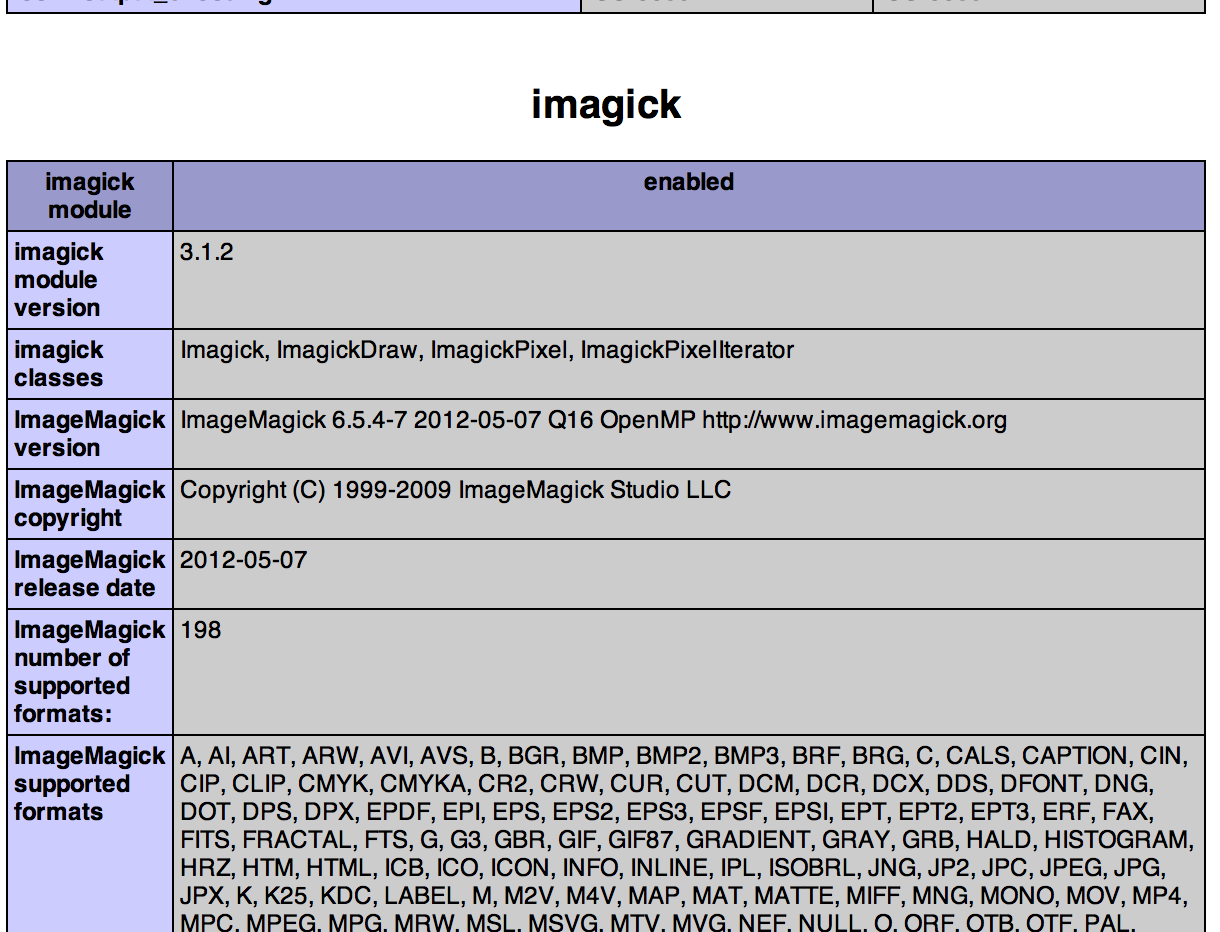
5.安装ImageMagick
PHP的应用程序中,很多都会涉及到图片处理,所有安装ImageMagick是很有必要的。安装之前应该先安装gcc和make
# yum install make
# yum install gcc
# yum install ImageMagick ImageMagick-devel
# pecl install imagick
# echo "extension=imagick.so" > /etc/php.d/imagick.ini
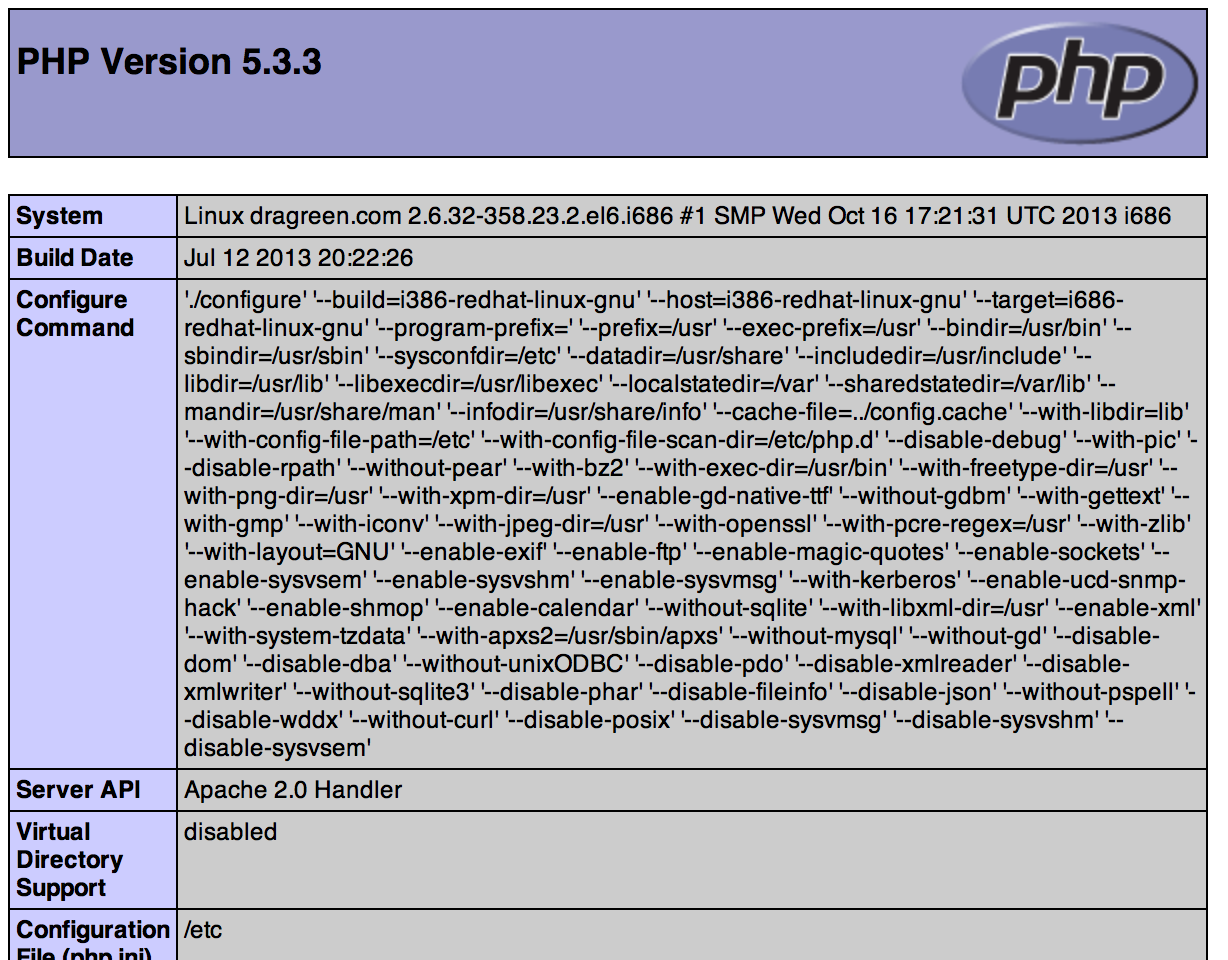
6.确认
在/var/www/html中添加test.php文件,test.php内容为:
<?php
  phpinfo();
?>
访问http://localhost/test.php,你应该能看到类似于以下界面
结束,谢谢阅读!!