
Linux(CentoOS)上安装ftp服务器,并且设置ssl安全链接
2014年07月15日
FTP服务器虽然不是很安全,又很消耗带宽,但某些时候还是有必要安装的,特别是当我们的客户对网络不是很熟悉的时候,
架设一台服务器很方便客户将文件上chuang
CentOS上安装FTP不是一件很难的事,但是需要加强服务器的安全,防止用户名与密码被盗。
1. 安装vsftpd
# yum -y install vsftpd
2.配置vsftpd.conf
# vi /etc/vsftpd/vsftpd.conf
# Allow anonymous FTP? (Beware - allowed by default if you comment this out).
anonymous_enable=NO ← 禁止anonymous(匿名)用户登录

# Activate logging of uploads/downloads.
xferlog_enable=YES ← /var/log/vsftpd.log 启动连接,传送日志

# You may override where the log file goes if you like. The default is shown
# below.
xferlog_file=/var/log/vsftpd.log ← 日志文件为 /var/log/vsftpd.log

# If you want, you can have your log file in standard ftpd xferlog format
xferlog_std_format=NO ← /var/log/vsftpd.log 设置日志格式

local_enable=YES
local_root=public_html ← 设置用户只能看到自己目录的public_html目录下的内容

# By default the server will pretend to allow ASCII mode but in fact ignore
# the request. Turn on the below options to have the server actually do ASCII
# mangling on files when in ASCII mode.
# Beware that on some FTP servers, ASCII support allows a denial of service
# attack (DoS) via the command "SIZE /big/file" in ASCII mode. vsftpd
# predicted this attack and has always been safe, reporting the size of the
# raw file.
# ASCII mangling is a horrible feature of the protocol.
ascii_upload_enable=YES ← 允许ascii模式上传
ascii_download_enable=YES ← 允许ascii模式下载

# You may fully customise the login banner string:
ftpd_banner=Welcome to blah FTP service. ← 登录FTP时隐藏软件名称以及版本号

# You may specify an explicit list of local users to chroot() to their home
# directory. If chroot_local_user is YES, then this list becomes a list of
# users to NOT chroot().
chroot_local_user=YES ← 限制用户只能在自己的目录下上传下载
chroot_list_enable=YES ← 允许chroot_list用户可以越过自己的目录
# (default follows)
chroot_list_file=/etc/vsftpd/chroot_list ← chroot_list文件路径

# You may activate the "-R" option to the builtin ls. This is disabled by
# default to avoid remote users being able to cause excessive I/O on large
# sites. However, some broken FTP clients such as "ncftp" and "mirror" assume
# the presence of the "-R" option, so there is a strong case for enabling it.
ls_recurse_enable=YES ← 允许文件夹上传下载

#添加以下
use_localtime=YES ← 设置ftp显示时间为当地时间
pasv_addr_resolve=YES
pasv_address=shintoku-town.net
pasv_min_port=60000 ← PASV模式最小端口号
pasv_max_port=60030 ← PASV模式最大端口号
ssl_enable=YES ← SSL有效
rsa_cert_file=/etc/ssl/private/vsftpd.pem ← ssl证书
rsa_private_key_file=/etc/ssl/private/vsftpd.pem ← ssl证书
force_local_logins_ssl=YES ← 强制SSL登录
force_local_data_ssl=YES ← 强制通过SSL进行文件传输

ssl_tlsv1=YES
ssl_sslv2=YES
ssl_sslv3=YES

require_ssl_reuse=NO
ssl_ciphers=HIGH    ← 使支持 DES-CSC3-SHA
3.添加可超越自己目录的用户(这里为qiais)
# echo qiais >> /etc/vsftpd/chroot_list
4.禁止某些用户登录ftp服务器,这里禁止sai用户登录服务器
echo sai >> /etc/vsftpd/ftpusers
5.生成服务器证书
# mkdir /etc/ssl/private
[root@centos certs]
# openssl req -x509 -nodes -days 365 -newkey rsa:1024 -keyout /etc/ssl/private/vsftpd.pem -out /etc/ssl/private/vsftpd.pem ← 生成证书
umask 77 ; \
PEM1=`/bin/mktemp /tmp/openssl.XXXXXX` ; \
PEM2=`/bin/mktemp /tmp/openssl.XXXXXX` ; \
/usr/bin/openssl req -utf8 -newkey rsa:1024 -keyout $PEM1 -nodes -x509 -days 365 -out $PEM2 -set_serial 0 ; \
cat $PEM1 >  vsftpd.pem ; \
echo ""    >> vsftpd.pem ; \
cat $PEM2 >> vsftpd.pem ; \
rm -f $PEM1 $PEM2
Generating a 1024 bit RSA private key
.................................++++++
................................++++++
writing new private key to '/tmp/openssl.OH7090'
-----
You are about to be asked to enter information that will be incorporated
into your certificate request.
What you are about to enter is what is called a Distinguished Name or a DN.
There are quite a few fields but you can leave some blank
For some fields there will be a default value,
If you enter '.', the field will be left blank.
-----
Country Name (2 letter code) [GB]:CN ← 国家名
State or Province Name (full name) [Berkshire]:Shanghai ← 省市
Locality Name (eg, city) [Newbury]:Pudongxinqu ← 区
Organization Name (eg, company) [My Company Ltd]:Qiai ← 单位名称
Organizational Unit Name (eg, section) []: ← 空ENTER
Common Name (eg, your name or your server's hostname) []:ftp.qiais.com ← 主机名
Email Address []:user01@qiais.com
6. 连接测试
———————— 从这开始为旧内容,不需要SSL的 ———————–
MAC电脑可以通过以下命令连接测试服务器
mac:~ sai$ ftp   ← 启动ftp
ftp> open client.hanbai.jp    ← 连接ftp服务器
Connected to client.hanbai.jp.
220 Welcome to blah FTP service.
Name (client.hanbai.jp:sai): client  ←  用户名
331 Please specify the password.
Password:                            ← 密码
230 Login successful.                ← 成功登录
Remote system type is UNIX.
Using binary mode to transfer files.
ftp>
———————— 旧内容到此结束 ———————–
为了测试SSL的连接,我们需要安装 FileZilla
设置连接信息如下:
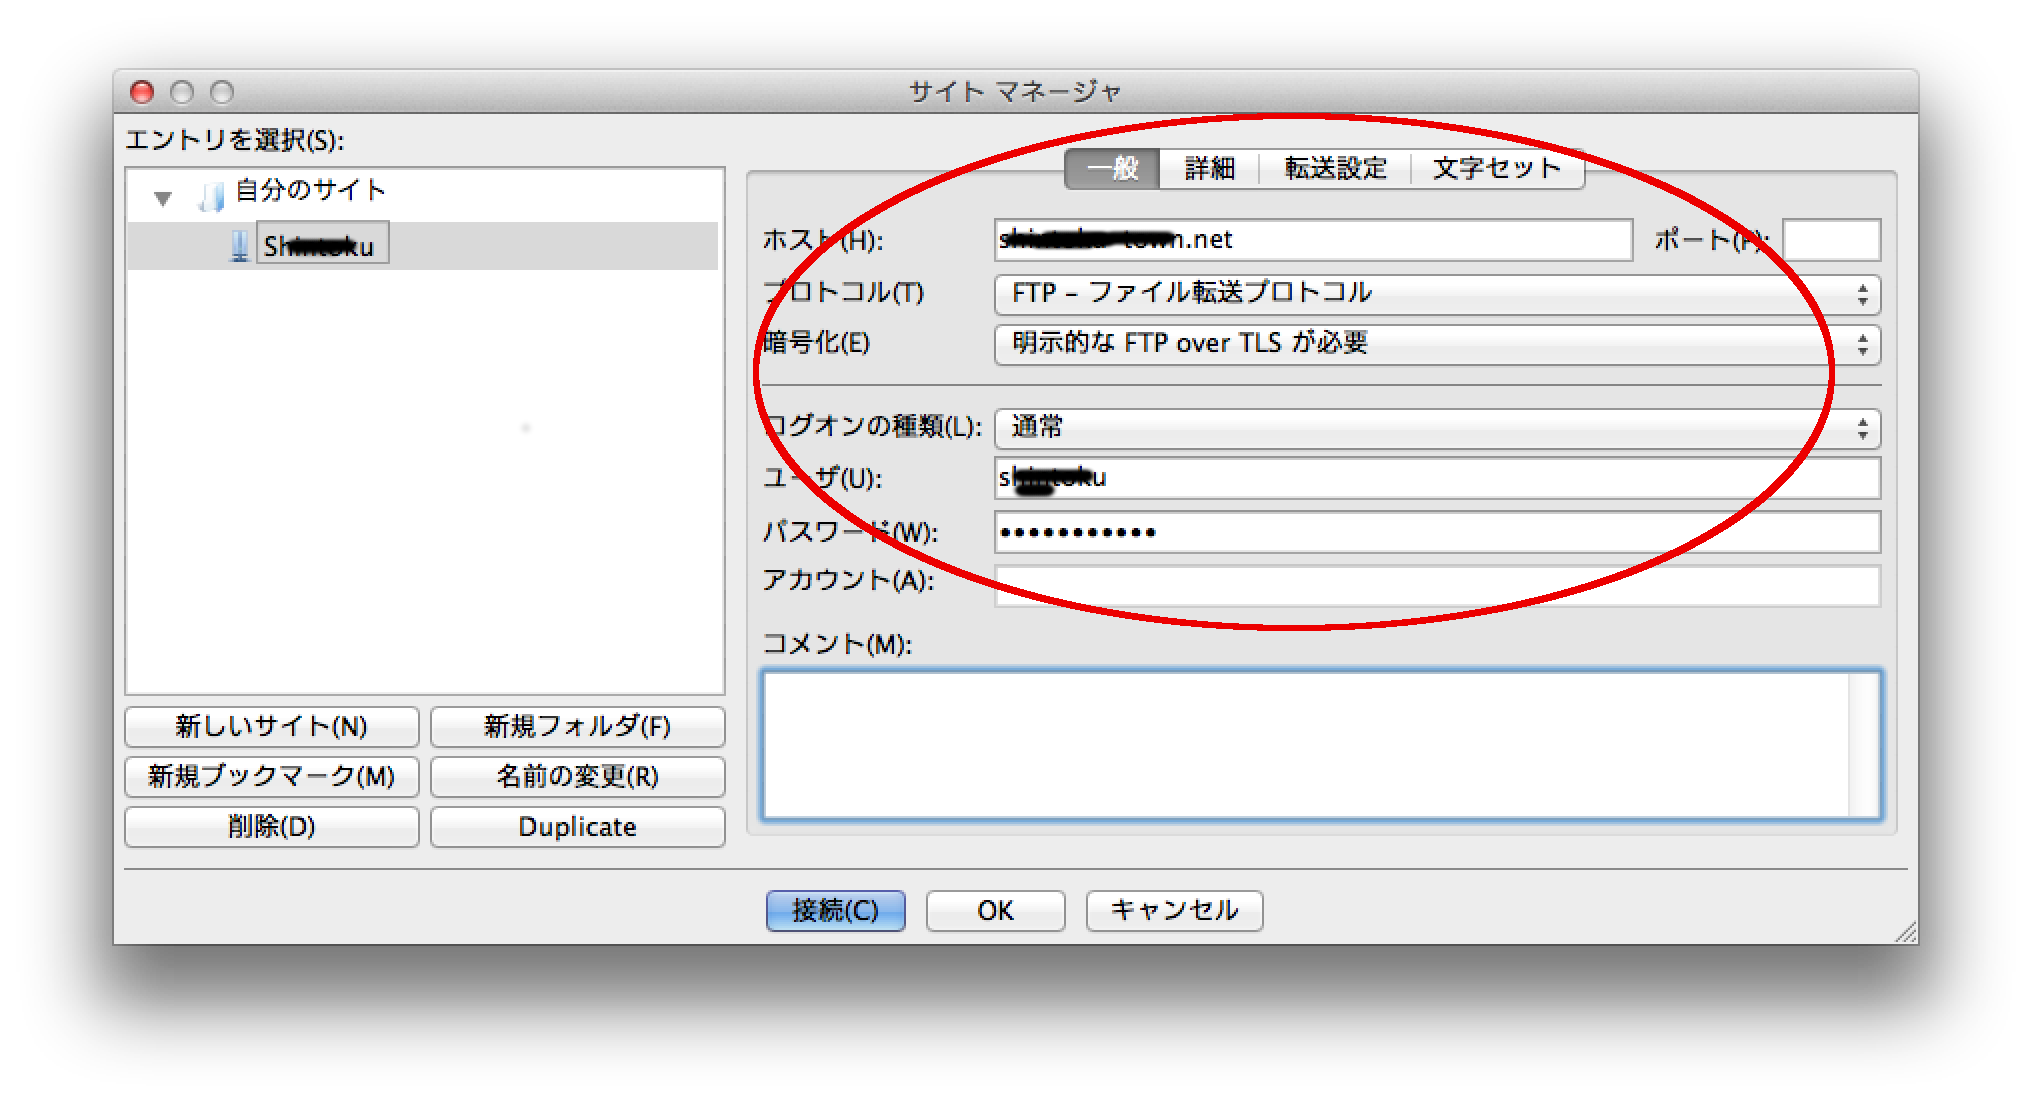
点击连接后会弹出证书确认窗口,点击OK就可以,
成功连接后的界面如下:
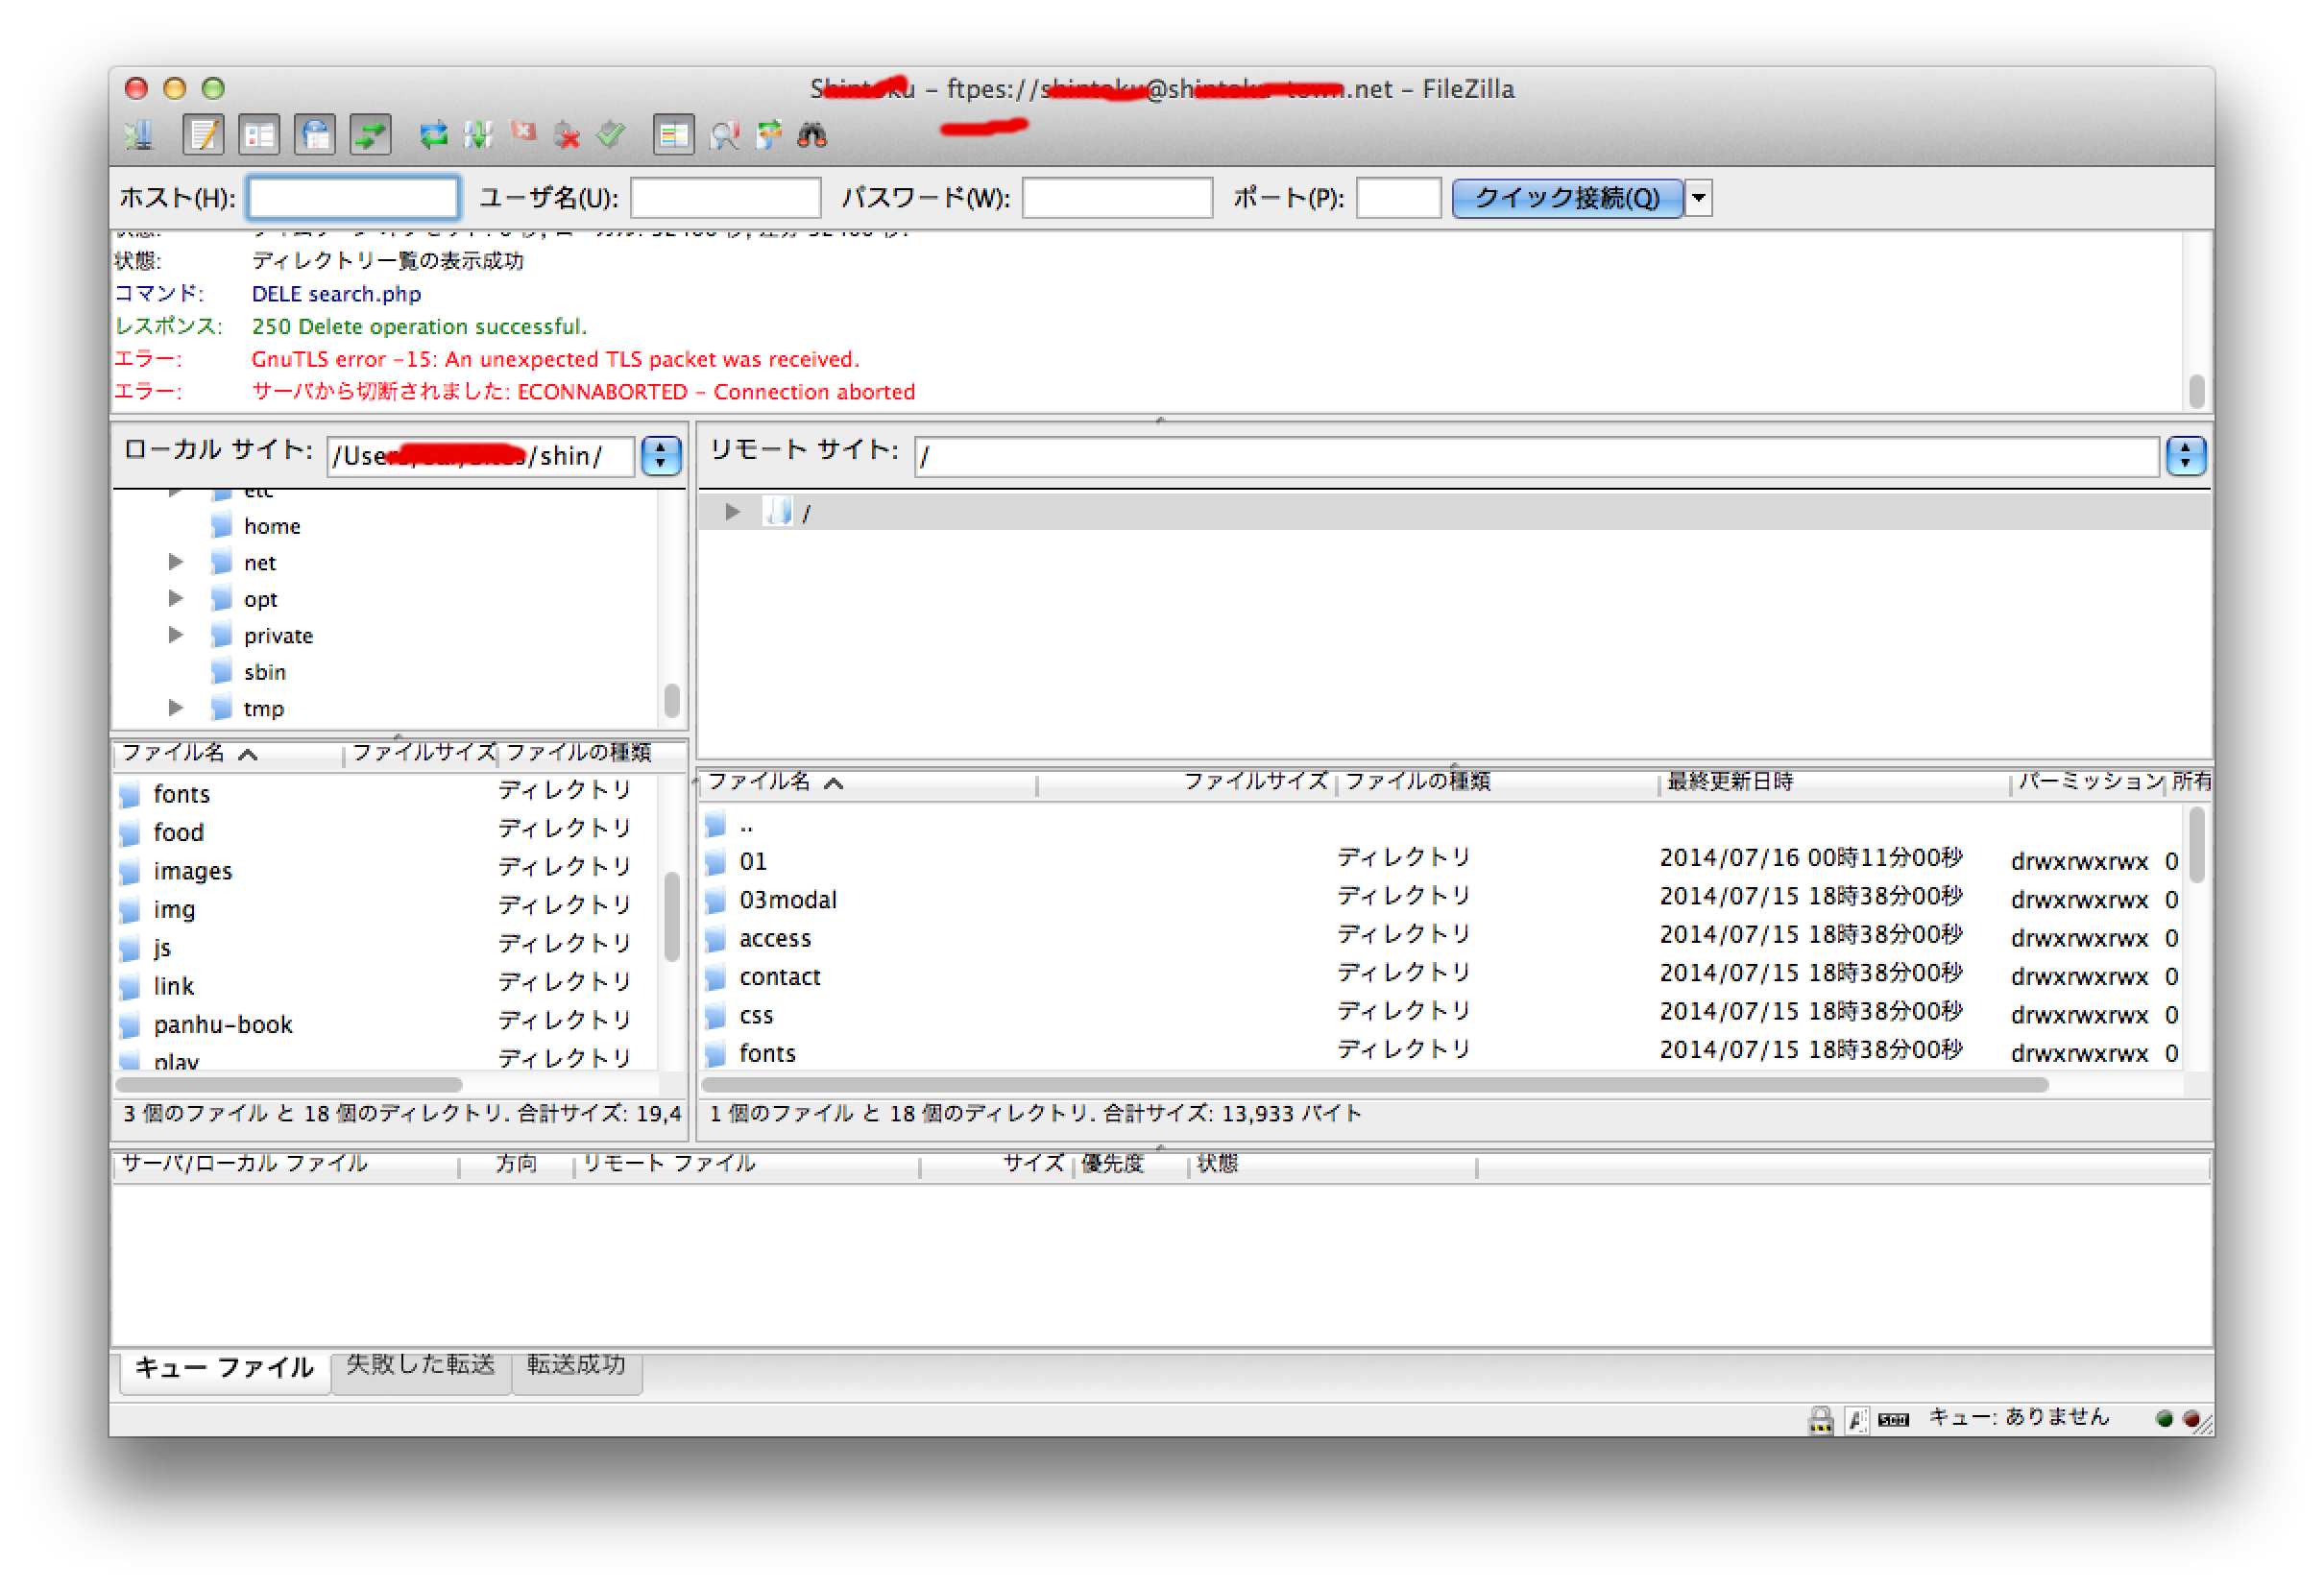
上面我们可以看到连接头部的ftpes://****@*****
表明我们的通过SSL连接的FTP服务器连接成功!
7. 附注说明
1)确保21端口开放
2)500 OOPS: cannot change directory:/home/*** 错误,基本是由于CentOS的安全保护程序Selinux的缘故,可以通过停止Selinux保护
# setenforce 0
或者直接修改配置文件,使seliunx无效
# vi /etc/selinux/config
# This file controls the state of SELinux on the system.
# SELINUX= can take one of these three values:
#     enforcing - SELinux security policy is enforced.
#     permissive - SELinux prints warnings instead of enforcing.
#     disabled - No SELinux policy is loaded.
SELINUX=enforcing   ← 将 SELINUX=disabled
# SELINUXTYPE= can take one of these two values:
#     targeted - Targeted processes are protected,
#     mls - Multi Level Security protection.
SELINUXTYPE=targeted
如果不想停止selinux保护,也可以让sellinux允许ftp_home_dir
[root@test ~]# getenforce
Enforcing
[root@test ~]# getsebool -a | grep ftp
allow_ftpd_anon_write --> off
allow_ftpd_full_access --> off
allow_ftpd_use_cifs --> off
allow_ftpd_use_nfs --> off
ftp_home_dir --> off
ftpd_connect_db --> off
ftpd_use_passive_mode --> off
httpd_enable_ftp_server --> off
tftp_anon_write --> off
[root@test ~]# setsebool -P ftp_home_dir on   ← 通过 setsebool 命令,修改 ftp_home_dir 的 off 为 on
[root@test ~]# getsebool -a | grep ftp
allow_ftpd_anon_write --> off
allow_ftpd_full_access --> off
allow_ftpd_use_cifs --> off
allow_ftpd_use_nfs --> off
ftp_home_dir --> on
ftpd_connect_db --> off
ftpd_use_passive_mode --> off
httpd_enable_ftp_serve
3) 只显示文件夹,没显示文件的情况
这种情况很有可能使Selinux保护的原因,我们可以先将Selinux停止再测试